Jute filigree: beautiful crafts from jute do it yourself. Flowers from burlap do it yourself.
Twine, which from time immemorial has been a companion of postal workers, can be useful to teachers and all creative people. Technique jute filigree does not involve the use of special tools and materials. A string of twine, glue, scissors, decorative ornaments - this is the whole basic set for creating masterpieces in the style of this “fine art”. Although, of course, classes of jute filigree require a certain perseverance and perseverance.
Publications of this section will help you and your wards to master this technique. Or, if the experience is already available, they will prompt original solutions for handicrafts.
Let's weave wonderful twine curls together!
Contained in sections:Showing publications 1-10 of 44.
All sections | Jute Filigree, Twine Crafts
During the school year, the guys from the “City of Masters” circle participated in various school events, ...
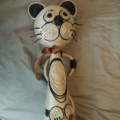 Master class "Cat from the twine"
I want to share my creativity, "The Cat from the splits". I needed 2 types of twine, black and brown, ...
Master class on decorating the bottle with string
Master class on decorating bottles with string. Dear colleagues! Today, I offer your ...
Master class "Making Christmas toys from twine"
Master class "Making Christmas trees from twine"
New Year is a long-awaited holiday not only for children, but also for adults. In the New Year's Eve there is no such ...
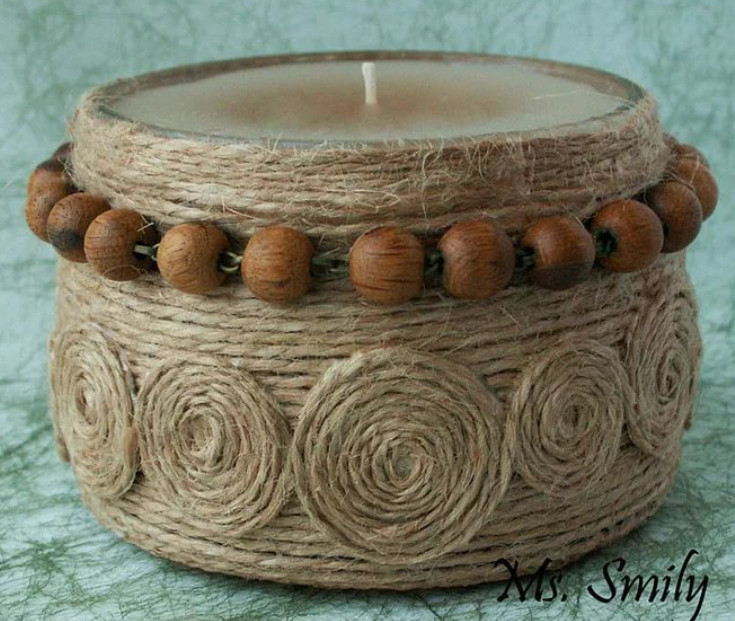
Despite the fact that the shelves of modern souvenir shops are full of many interesting items, often needlewomen want to do something with their own hands. Recently, twine crafts have become very popular. This is connected, firstly, with the original appearance of the finished product, and secondly, with the ability to successfully combine this material with many others for a more interesting piece. Attracts needlewomen and the fact that with their own hands they can make objects both exclusively for decorating the house, and for use in practical purposes.
Twine bow: preparation of materials
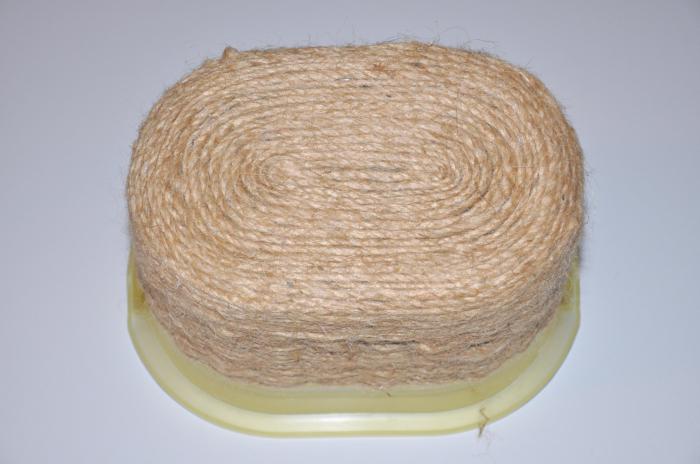
One of the easiest to manufacture are such twine crafts as bows. The finished product can be used to decorate a hairstyle, and attach it to a dress or jacket in the form of a brooch, and to decorate various objects with it, such as vases, jewelry boxes, bags, etc.
So, to create a bow, you need a glass or can with a diameter of 8-15 cm, depending on the expected length of the finished product, scissors, and of course, the string. When all materials are prepared, you can start creating a bow.
Making a twine bow
It is necessary to wind the twine in the available capacity so that the coils are as even as possible and touch each other. It is necessary to do these actions to achieve the desired width of the future product. Next, the thread must be cut, hold both its ends, cover all the turns with a layer of silicone glue and allow to dry.
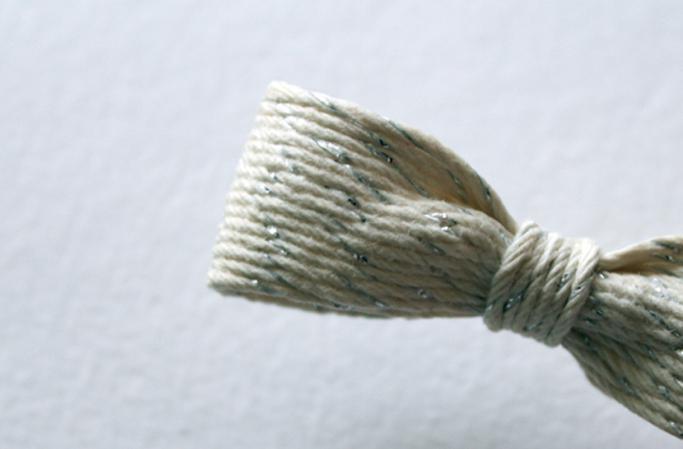
After the time required for drying out, the twine should be removed from the can and slightly squeezed in the middle, forming a bow. Then in the center of the product, make several turns of the same thread and fix them with glue on the back side. Ready bow can decorate hair or any crafts. You can make the number of ribbons necessary for a particular purpose out of the string with your own hands.
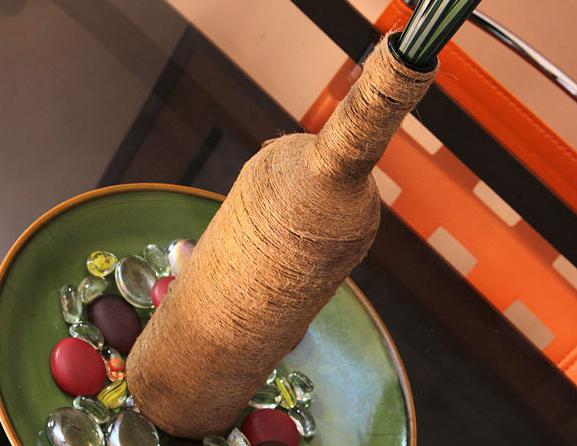
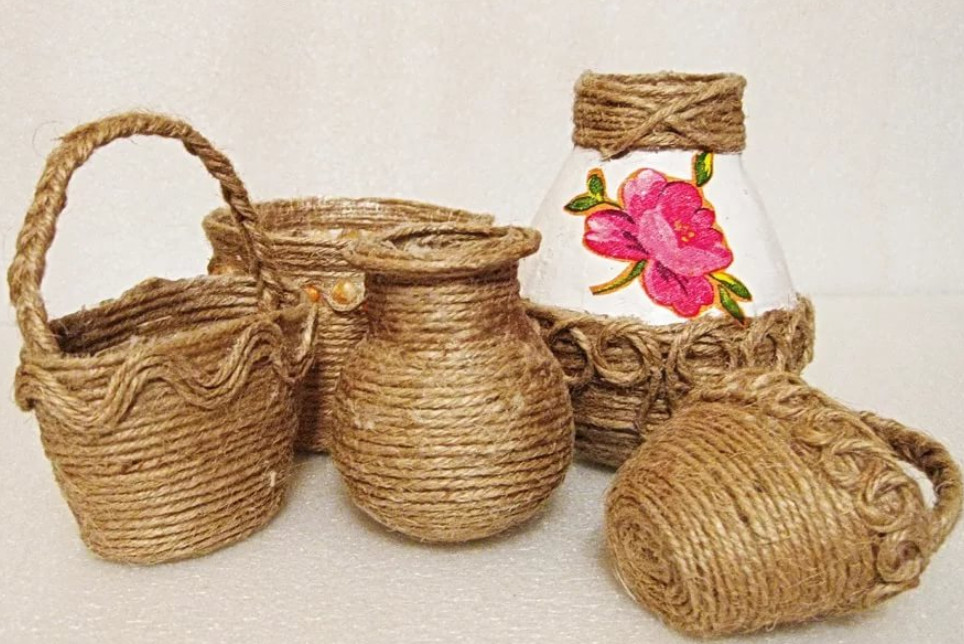
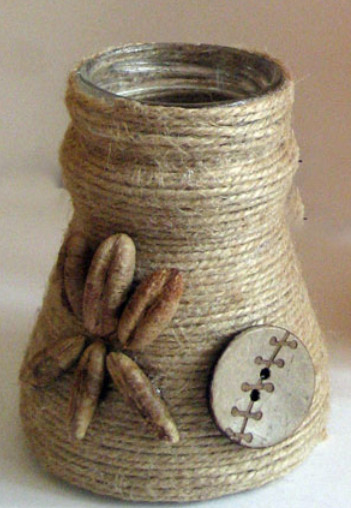
Vase of twine and wine bottle
No less interesting crafts, which has a practical purpose, can be a vase made of a glass bottle and twine. In addition to these materials, you will also need to start the production of this craft from twine from the bottom of the bottle. To do this, its surface must be evenly covered with glue, and then wind the twine around the container. It is important that the coils are smooth and tight to each other. These actions should be done until the top edge of the bottle neck is reached. The thread should be cut and leave the product for some time to dry.
If you wish, you can decorate a finished vase with rhinestones or dried flowers, or you can leave it as it is, and it also has a rather original appearance. Believe me, the attention of all your guests will attract similar crafts from twine. Photos of the vase, you can see below.
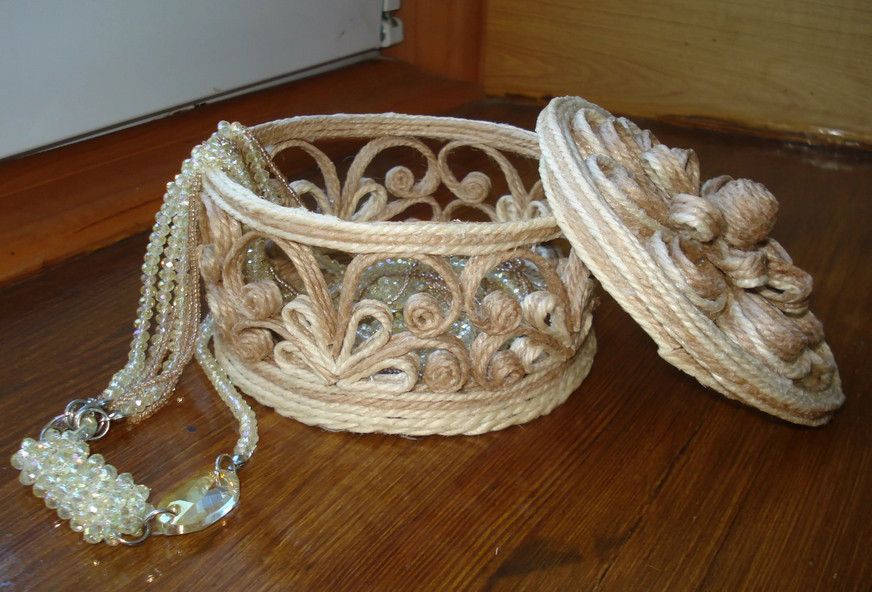
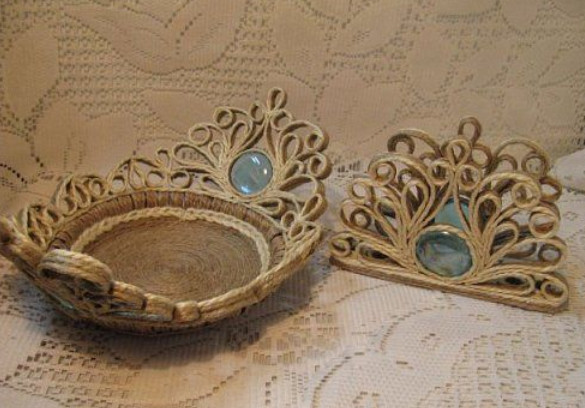
Basket of twine: making walls
Among the useful gizmos that can be made of twine, the basket also deserves attention. For its production you will need to prepare the following materials: glue, crochet hook, plastic jar, the volume of which corresponds to the size of the future basket, and twine. First, on the upper rim of the container, used as a basis for crafts from the string, you need to make small notches, which will be at the same distance from each other. Next, the rope should be vertically and crosswise wound on a jar, passing it through the notches, thanks to which it will remain in place. When there is a twine in each notch, the thread should be cut and temporarily secured with glue. Next, the twine must be interlaced between the vertical threads, ensuring maximum contact between the coils. Begin work from the bottom, gradually moving to the top. To facilitate weaving walls, you can use a hook.
Basket of twine: making the bottom and decoration
After covering the plastic jar with string, you can proceed to the manufacture of the base. To do this, the container should be turned upside down and glue the threads on it. Further, starting from the center and gradually moving to the edge, it is necessary to fill the surface with twine, placing it with coils in a circle. After this stage, you need to wait a bit to dry the glue, and you can proceed to the design of the upper part of the crafts from twine. All threads should be cut in the place of interlacing and, seizing the adjacent ropes with your fingers, twist with force until the curl is formed of them, at the base of which a drop of glue should be applied to prevent it from unwinding and attached to the base. The result will be a little rosette. A similar operation should be done with all the threads. After that, the plastic base can be pulled out. In the resulting basket you can put various small items or set a pot of flowers.
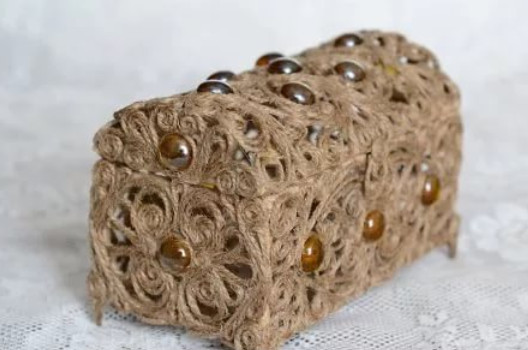
Turtle from the twine and coffee beans: a master class
There are exclusively decorative articles made of twine. A master class on making their turtle and coffee beans will certainly be useful to those who love to decorate their home with all sorts of souvenirs. For the manufacture of this crafts will need foam rubber, scissors, paint, cardboard, glue "Moment", coffee beans and twine. Begin work with creating a cardboard template. To do this, on the sheet you need to draw the outlines of the body of a turtle and cut.

Next, using a template, make a similar billet of foam rubber and glue the existing parts. Then on the legs, face and tail should be wound twine. To continue the manufacture of this crafts from jute twine, it must be installed so that the cardboard side is on top, and, having covered the surface with glue, paste it with the same thread laid with coils. From above to paste coffee beans in two layers, forming a shell. At the final stage it is necessary to make eyes. To do this, in the appropriate places, you should glue two grains and paint to paint the missing parts. Here is ready decoration for your home or office! Such a turtle can also be an excellent gift.
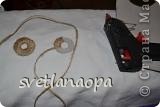
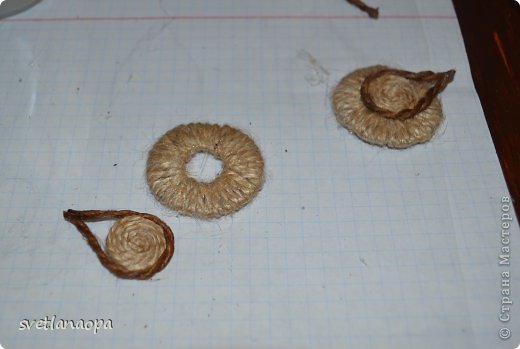
Promised MK on owl.
For the work we need: twine, glue Titan or Dragon (you can replace the moment), glue gun, a piece of cardboard, a file, a blank sheet of paper, wire or paper clips large for the legs, masking tape, a roll of cling film, half a bead, newspapers and of course patience .
I previously dyed the twine with the help of rasterized coffee with the addition of PVA glue quite a bit so that the thread was slightly stiff and did not unwind.
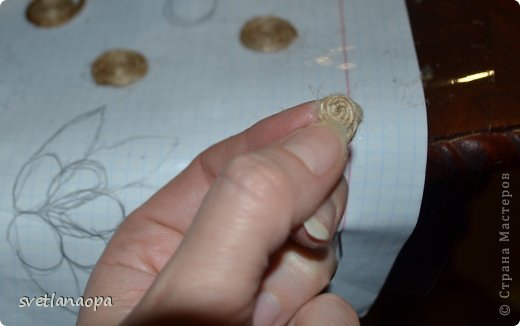
So let's start, let's start with the peephole. We draw on cardboard and cut two identical rolls and use the glue gun to wrap our blanks with string, we got the shell of our peepholes. Choose the size individually, depending on what size you want to make an owl, I made it 3 cm in diameter.
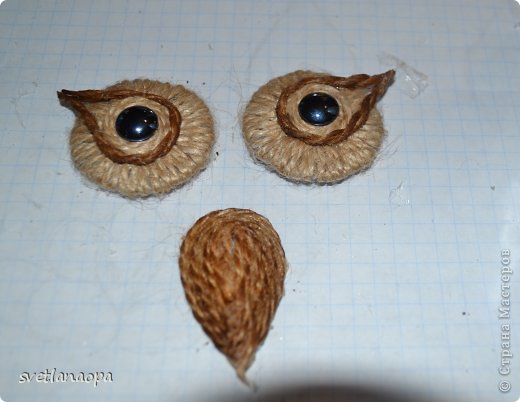
We draw pupils on a piece of paper (the size is slightly larger than the cut out center of our bubbly eye shell) and our owl's beak. We insert the sheet into the file (I first used a film for packing flowers, but it slips very much and is not convenient to work) and start with glue Dragon (Titan), fingers, tweezers, toothpicks — for whom it is convenient to make circles on a file.
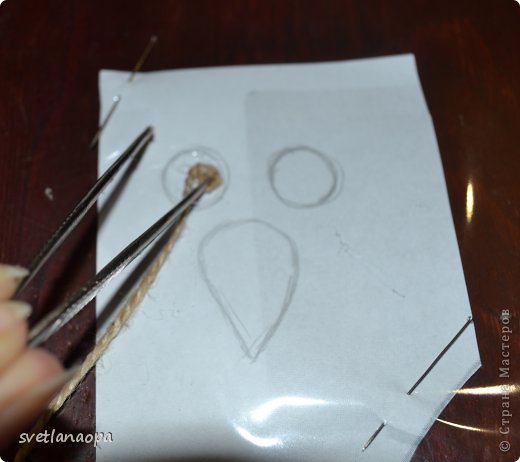
I did this: I put a little Dragon glue on the file (you can Moment, but I can barely smell it), I wash the tip of the twine in this glue, so that I do not shake and start doing a couple of curls on my finger, and then I paste it on the file where I glue, hold finger or tweezers for a few seconds to grab. I drop a few more drops around, smear a toothpick around our glued windings and twist the coils further (do not pour a lot of glue, he quickly grabs) and repeat the procedure several times arisovanoy preform pupil glaza.To Hope appreciated described process.
We also make the second pupil and go to the beak, starting from the middle (as shown in the photo)
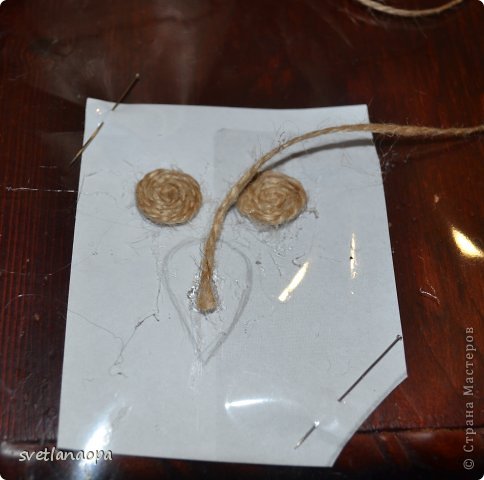
We make the beak in the form of a droplet, for this we make the lower part sharply squeezing when gluing with fingers, making a sharp angle, and press it down slightly from above, giving a rounded, flattened form. You will see fluffy glue moths, which are neatly cut with scissors.
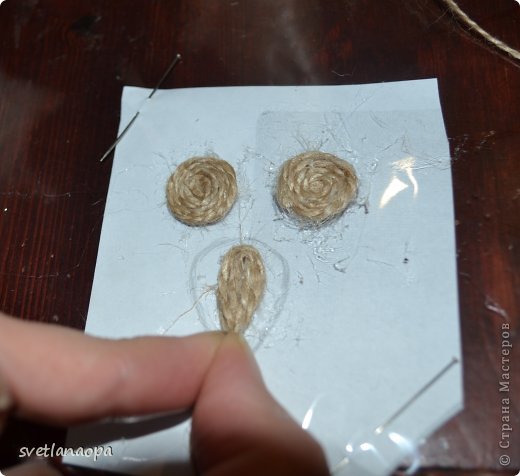
We will make an expressive edging of our pupils, for this we cut small pieces of colored twine, drop a drop of glue on the ends of the segment and glue them together, then we glue the pupil with glue on one side and glue our border.
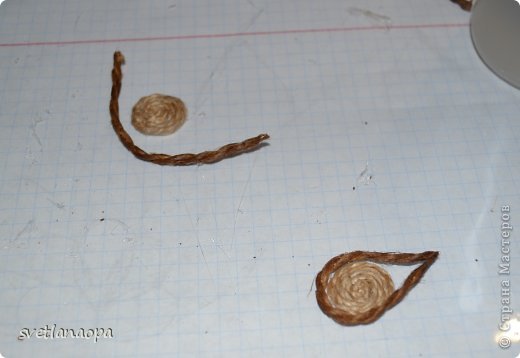
Now the pupils can be glued to the eye rim with all the same Titan or Moment, for whom it is convenient.
In the middle, I glued black half beads, if anyone does not, you can glue buttons, halves of colored beans, in general, all that your imagination will allow.
I did the previous little owl with green eyes, she was not that awesome.
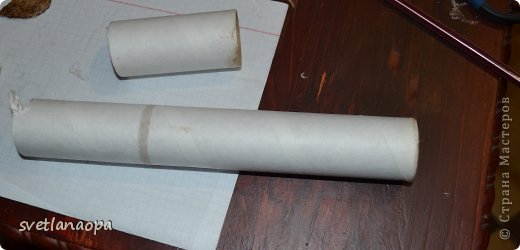
We turn to the body, to create it, you can use any unnecessary plastic material jars of a suitable size, for example, from under medicines, shampoos. In my case, I used a roll of food film (foil), cut off about a fourth of it, stuffed it inside the newspapers.
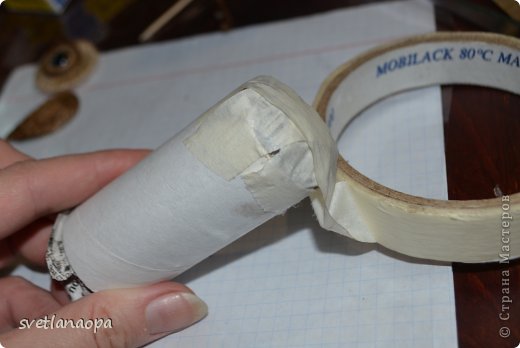
From above I gave a slightly convex look and pasted over with masking tape, until we touch the bottom until we attach the legs.
I made paws from 3 big clips, they are tough and keep their shape well, I straightened them out with a nipper in half, wrapped each one with a gun with a string. You can use hard wire.
Then I connected 3 pieces together and wrapped it around the top with a twine again.
Although it was necessary to do 4 pieces, and bend one wire back, then you can put an owl on its paws (I will take into account for the future). Another calculation of the ratio of the paws and torso, in me they turned out very huge in my view ... ( Well, it's an amateur)
Before you is a master class of my basket of twine, or twine, as you like.
This time I made a tiny box, but it brought trouble ... Saturday, it means a day off, but for someone it can be a day off, but for me it is a cleaning-up, as well as all the things are redone, and I am inspired, sitting with a camera in my hands and I understand that he ... sat down, was discharged ... at the most inopportune moment.
Master class baskets of twine or twine
Well, what's the master class there. While I was charging, my husband came home from work - she fed me, and already late in the evening I mastered, wove the basket.
Farther! At home, my Internet is very slow, so I moved everything on Monday, the work day (the Internet is better at work), and I was not surprised when I learned that it does not work, it works more precisely, but it is even worse than at my place. For half a day I tried to upload photos, and now a miracle appeared ... So what do we need ...
And we will need:
- cardboard box, the desired size (in the first case, I took the shoe, and this time from under the candy);
- twine (twine);
- ruler;
- pen-pencil);
- scissors (construction knife);
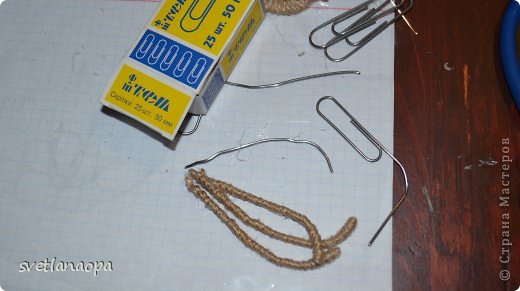
- glue gun. all as in the photo, well, except for the construction knife, but it will definitely be =))) 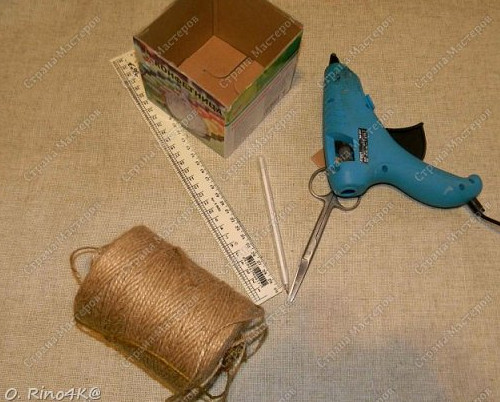 Take the box and cut it in this way, i.e. we make cuts in the corners.
 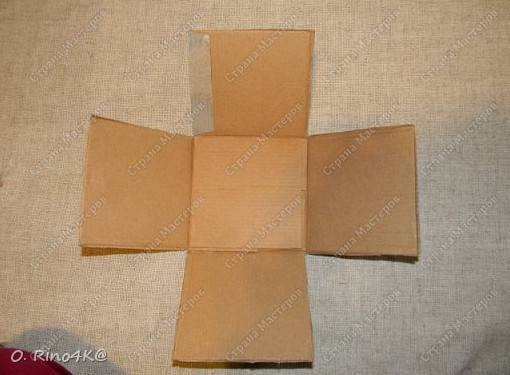 Next, do the markup on the sides. Here everyone does what he wants, thin or thicker. There are two "required":
- surely make at least some distance between the stripes, otherwise the thread will be coiled;
- be sure to do an odd number of stripes, otherwise the thread will not intertwine, but repeat. 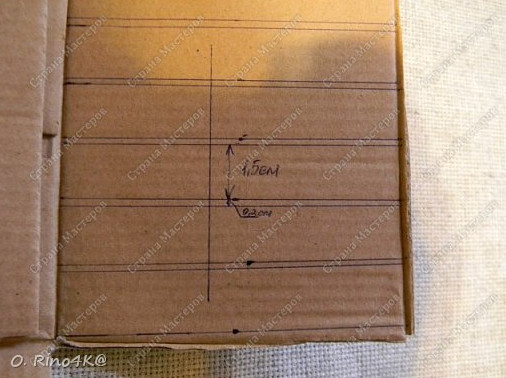 Here I have, for example, on 3 sides of 6 stripes, and on the 4th - 5, a total of 23.
 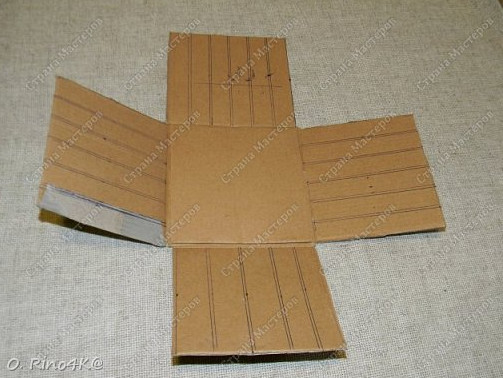 We take a construction knife (I told you that it will appear) and cut it.
 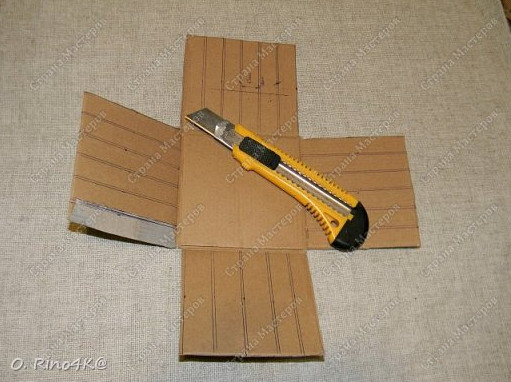 That's what happens in the end.
 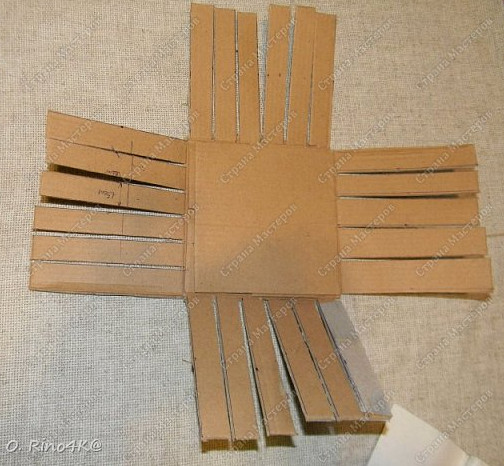 Well, and then things are easy - we take a thread and start to wind. I fix the beginning of the thread with the help of hot glue.
 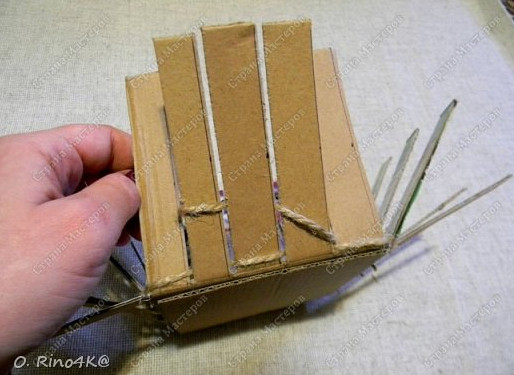 Mota ...
 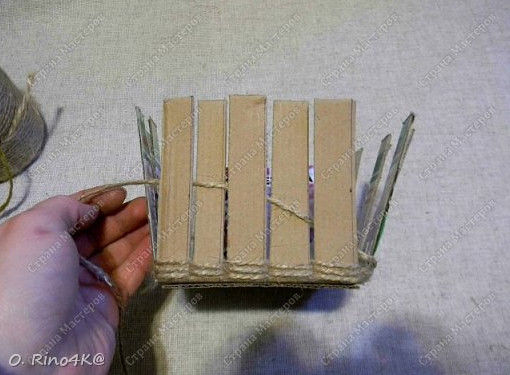 ... we shake ...
 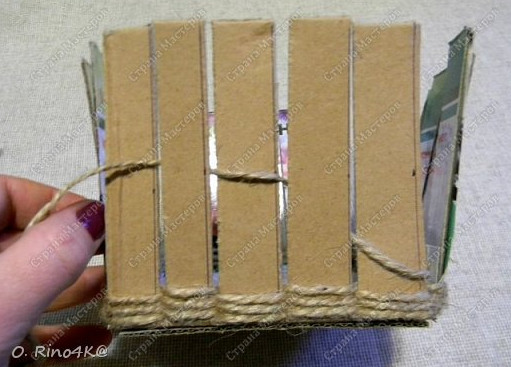 oh, the beauty turns out, so do not get distracted - we shake further ...
 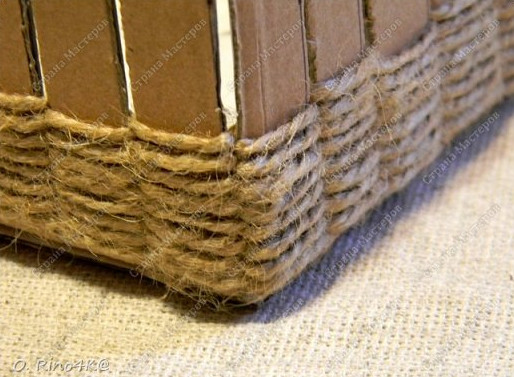 So we got to the edge. And the edges, too, need to be refined. I am not worried about this - after all, there will be a small case on top of me. But still. Twisted here such a cord (next to the little box is)
 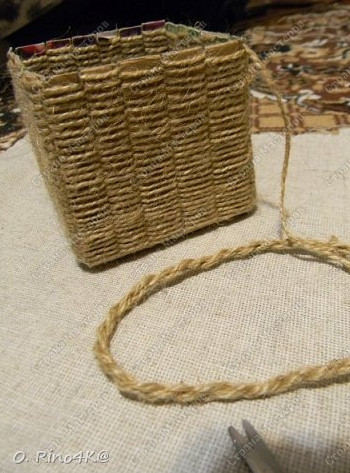 And hook it to the edge.
 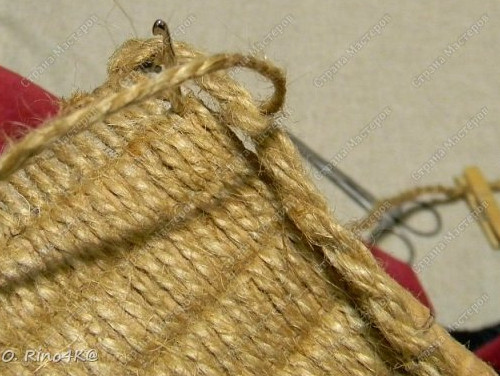 That turned out to be a basket, unexpectedly for me - a trapezoid.
 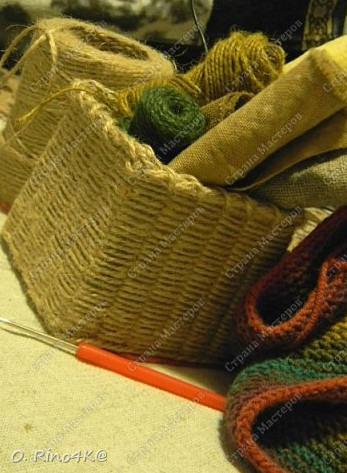 It remains to embroider a nice little plot and sew a case.
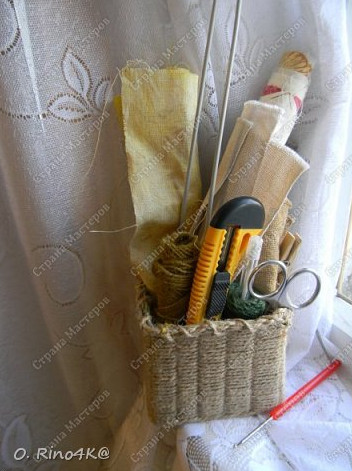
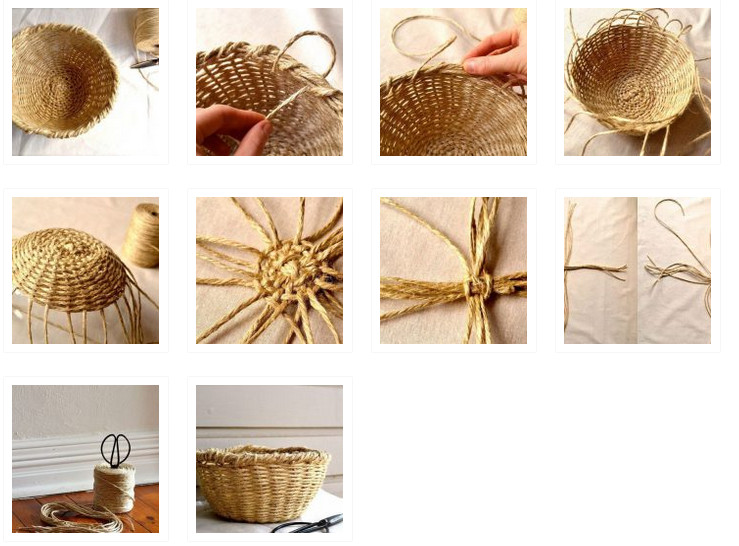
From the usual twine you can weave your own basket with your own hands.
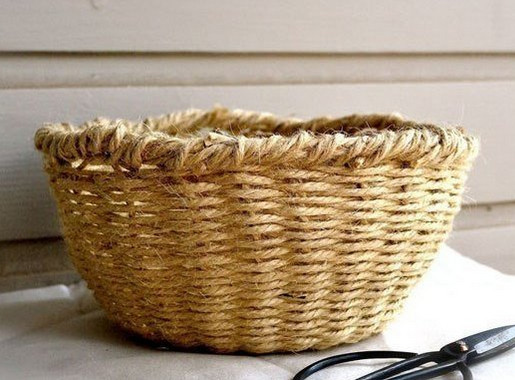
For the manufacture of baskets will need:
- 20-25 meters of 5 mm twine
- scissors
- form (deep bowl, which weave).
Make 12 cuts of rope 65 cm each.
Arrange 11 ropes in the form of a cross: 5 ropes - horizontally and 6 vertically. Twelfth rope secure in the middle. This will be the basket frame.
Now you can begin to weave. To do this, fix the main in the middle.
Weave in a circle between the ropes of the frame.
To make it easier to form a future basket, you can use any bowl and weave on it.
When the basket becomes the desired height, fasten the main thread.
The threads of the frame should also be fastened by wrapping each thread around the last two rows.
It is necessary to turn in the direction inside the basket.
The basket is ready, you can fill it with candy, fruit or whatever you want.

But on this we do not say goodbye, come again!
Subscribe to our page updates on