Drawing lessons with watercolors. Watercolor painting lesson for beginners. Tools and materials. Blending and transparency. What you need to work with this type of paint
Handmade selection of 8 Free master classes of the school of drawing. Drawing lessons are very simple and inspiring. I recommend it to those who do not know where to start, but understand that they cannot live without creativity. The master classes show how to draw landscapes, portraits, fashion illustrations, a human figure in different techniques. The collection of lessons is hand-picked - especially for those who want to learn and start to paint with watercolors. Lessons showcased techniques that liberate and liberate your inner artist.
Friends, artists and illustrators! Enjoy your viewing and a lot of creativity!
1. How to stop being afraid of watercolors and start painting. Introduction. Drawing lessons.
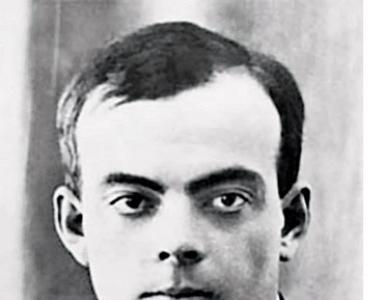
 Veronica Kalacheva
 In this video tutorial, we dive into a bold watercolor master class with Veronika Kalacheva
2. How to stop being afraid of watercolors and start painting. Landscape. Drawing lessons.
 Veronica Kalacheva
 This video tutorial shows you how to paint a landscape using a quick watercolor technique.
3. How to stop being afraid of watercolors and start painting. Human's figure. Drawing lessons.
 Veronica Kalacheva
 A simple way how to draw a human figure without preliminary drawing
4. How to stop being afraid of watercolors and start painting. Landscape.
 Veronica Kalacheva
 Trying a landscape genre in raw watercolor technique.
5. How to stop being afraid of watercolors and start painting. Landscape with a bridge. Drawing lessons.
 Veronica Kalacheva
 Another watercolor technique for fast, bold landscapes.
6. How to stop being afraid of watercolors and start painting. For the brave. Drawing lessons
 Veronica Kalacheva
 Veronica Kalacheva demonstrates techniques that liberate and liberate your inner artist
To the official heyday, which came on a foggy London morning only in early XIX centuries. A frightening abyss of centuries gradually changed the materials and techniques of watercolor painting: the paint "came to life" on papyrus and rice paper. Later - in the working sketches of artists or a ghostly "haze", almost an illusion, thinly hidden on the sheets under the confident drawing of a lead and a pen.
Basic watercolor painting techniques
True work in the technique of watercolor is akin to the emerging bright morning: it smells of fresh grass, flowers, overturning the subtlest images and thoughts from its soft depths on us. But roses also have thorns! Despite its velvety, watercolor can be impudent and capricious. The nervous graphicality of the lines, the stiffness of the strokes and the density of tone are quite acceptable to her. It all depends on the tasks set by the artist.

Amazing watercolor painting by Japanese artist Abe Toshiyuki.
Technique "A la prima". The Italian energetic approach to solve everything in one go french painting impressionists. In fact, this is a “one touch” technique, writing pictures on wet paper at once, without alterations and additional overlays of paint layers. The fascinating effect of the work is the unpredictability of the final result. This painting technique exists wonderfully in landscapes, suggesting the skill and dexterity of the artist. Although this watercolor painting technique for beginner painters is also good lesson to "fill your hand" and "sharpen the eye".


Watercolor cityscapes by American artist Thomas Schaller.
Painting technique "raw". The plot is written on abundantly moistened paper. Most often, the master touches paint to the sheet, which has already well absorbed water. The degree of filling the brush with water is also controlled. Depending on the tasks, the author writes either with a dry brush on a wet background surface, or "wet-on-wet". The essential difference between this technique is that the artist can carry out a separate drawing of details on dried paper, complementing and clarifying the plot. Such a watercolor painting "sinking" on the wet surface of the sheet allows you to achieve a lot of impressive moments: picturesque softness, subtle color transitions, lightness and transparency.


Rain in watercolors by Taiwanese artist Lin Ching-Che.
Multilayer technique painting... Reception is carried out due to transparent color glaze - fillings and paint strokes, which are superimposed on each other in layers. Each layer must be dried, avoiding mixing. As a result, correctly filled paints form a gap, filling the depth of the painting with transparency. Multi-layered watercolor creates rich reflections and deep shadows, striking with realism and special color resonance. The technique is excellent for depicting multi-faceted complex landscapes, still life productions and portraits.


Watercolor still life of the artist Elena Bazanova.
Painting technique on dry paper... In watercolor, it is sometimes difficult to understand where painting ends and graphics begin. The dry method is just the case for those who want to control the spreading of paint on paper, with the drawing of thin linear and clear contours. But there are other options as well. One of the popular ones is a one-layer painting with a well-dampened brush. Each fill forms a water sludge that blends with the next brush strokes. Thus, the combination of colorful islands gives a pleasant softness and beautiful mixes.


Realistic watercolor by Steve Hanks.
Mixed painting technique... If you want to get away from classical watercolors and learn to paint outside the box, the combined approach to painting is an irreplaceable assistant. The painting combines both various art materials, and techniques, sometimes even mutually exclusive. For example, in one work, the author is able to combine the method of writing on wet and dry paper. Mix watercolor with ink, wax, pastel, watercolor pencils, in gouache, achieving amazing effects, but sometimes - to the detriment of the "purity" of the watercolor sound.


City landscape in watercolors by Heinz Schweizer.
Notable schools and watercolors
Before the appearance of paper, watercolors in an almost inaudible whisper declared themselves on thin canvases of Chinese silk. Spilling over into the laconic graphics of hieroglyphs and stunning Asian landscapes, the paint has long been entrenched in this poetic genre. Made in China, paper has contributed to further development oriental watercolor school with a special personality and national flavor.


Delicate floral watercolor by French artist Sylvie Fortin.
The classical multi-layer painting - genius creation English school of watercolors. Distinguished by its full depth and thick tonality, it was not inferior to the "oil" paintings, and even surpassed them with its airiness. The second half of the 18th century was a time of great change and the flourishing of English watercolors. A deep imprint on its history was left by bold innovative artists: T. Guertin, D.W. Turner, D. Constable and many others.
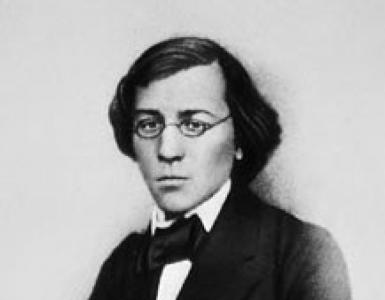
Watercolor came to Russia late. Dense, multi-layered writing on dry paper was used by the brothers Karl and Alexander Bryullov, creating "living" images of their contemporaries. The legendary A. A. Ivanov turned to this technique for quick, sketchy writing, creating small masterpieces of painting. PF Sokolov is an artist of marvelous miniature portrait watercolors - symbols of an elusive era.


Watercolor still lifes with flowers by the Korean artist Yi Seong-bu (Lee Seok Bo).
In the late 19th and early 20th centuries, translucent paint gained great popularity among Russian artists. M. A. Vrubel, I. E. Repin, V. I. Surikov often worked in this technique. Petersburg artists (A. N. Benois, A. P. Ostroumova-Lebedeva, K. A. Somov, L. S. Bakst and others) were especially fond of watercolors.
Later, the technique of watercolor glazing was forgotten for a long time, existing only in England. Nowadays, multi-layered painting is reviving again. Watercolor schools are opening, exhibitions, contests and training courses for fans of this thoughtful artistic technique are held in Moscow.
There are never many ideas for creativity, and if children also participate in the creative process, you must admit that it often becomes not only creative, but also research. Today in Anastasia Borisova , blog author English4.me - English for me and my family... Anastasia's blog is not only about language, but also about creativity, so today we go on an excursion to creative storerooms and study simple watercolor techniques and techniques.
How many creative and well-rounded moms are here on! And interesting finds await us at every step. Many mothers, seeing after some classes the incredible result of their 2-4 year old child's work - albeit not always the same as intended - exclaim: “How original and simple! Where is it taught? " Everyone wants to become a little bit of a sorceress for their children.
So I, using the simplest techniques, I painted a winter landscape in 15 minutes, which my husband considered worthy to put up for sale. 🙂
The best children's books
The non-standard use of materials and the variety of created effects give the child the feeling "I can!"
Watercolor is fluid and naughty. We will use just these not always convenient properties, creating “masterpieces” mostly “wet”.
1. Crayon resistance effect - manifestations of wax crayon
This is perhaps the most common technique. A drawing or inscription is applied to a sheet of paper with wax crayon or a candle, and painted over with watercolors on top. Using a white crayon or candle, you can make secret notes or congratulations; yellow crayon creates a glow effect; bright blues, greens and pinks underneath dark watercolors - neon effect. You can also combine this technique with rubbing. We put a textured substrate under the sheet (everything that can be found at home) and rub it on top with the flat side of the chalk. If you do it carefully, and put leaves or some kind of embossed object, you get excellent prints.
2. Salt - salt on wet watercolor
Sprinkle salt on the still damp, painted sheet and you can achieve interesting effects. Medium coarse salt leaves "snowflakes" on the blue when it dries. On a green background, you get translucent foliage. Fine extra salt dries up almost tightly. So you can add texture to the road, stone, create a galaxy.
3. Blotting - bleaching paint.
By removing excess water and a layer of paint from the sheet with a dry napkin, you can paint winter spruces covered with snow, or sea foam. You get a pale moon or sun by wrapping a toilet paper tube with a tissue paper and blotting the watercolor sky. Even an already dried drawing can be touched up by sprinkling it with water and gently rubbing the desired area.
If you crumple a napkin and put it against a blue sky, you get very natural clouds.
A crumpled napkin also produces an interesting texture. Texture sheets can then be successfully used to create collages.
4. Pressing - pushing
In the picture above, you can see a clear inscription in dark letters (I ...). It was made on wet watercolor with the tip of a brush (the paint seems to flow down into the pressed hollows). In this way, you can label the drawing or add details. Placing a sheet of wet watercolor with a textured object on it under the press works on the same principle. It is best, of course, to print the leaves like that. But even from the feathers and branches of a Christmas tree, a good decorative picture comes out.
5. Splatter and spray - splashing
A toothbrush plus watercolor will help to make rain, snow, leaf fall, to depict the wind. It is interesting to just sprinkle different paints on a dry sheet. A dampened leaf will have a very different effect. It will be possible to observe how the droplets spread out, merging with each other into a whimsical ornament.
You can spray around the stencil, or vice versa inside it. A consistently original result is ensured. Just do not forget to cover the workspace with newspapers, the paint flies far away.
6. Masking tape - drawing with masking tape
I was surprised to find that the aforementioned adhesive tape peels off the paper several times perfectly, which means we use it as the basis for the stencil. You can tear it with your hands into uneven strips and draw a forest.
Any geometric compositions are great. You can even cut something more detailed into the thickness of the tape, such as the houses in the first photo. The main thing is that this stencil does not need to be additionally fastened and held, and the likelihood of paint getting under it is not great if the edges are well smoothed.
7. Foam painting - painting with foam
Fun and beautiful texture in one bottle. In a container you need to mix water, a little liquid soap and a lot, a lot of paint. We give the child a tube and let him blow the bubbles. As soon as a high cap grows, we apply paper to it. At the same time, it is better to undress the child completely, so that later it will be easier to wash it.
8. Alcohol and citric acid - alcohol and citric acid
Both liquids, as it were, "push apart" and "eat away" the paint. A drop of alcohol has a fish-eye effect, and its volatility can create additional areolae around that eye, similar to a halo around the sun. Very unusual.
Lemon juice spreads well over fresh watercolors, but does not affect dried ones. It spreads quite a bit by itself, so it's important not to overdo it. Ideally, these "shaggy" blots are obtained. After drying, they can be turned into monsters or someone else by adding arms, legs, eyes.
9. Stamping - stamping
For my taste, it is better to work with stamps with thicker paints - gouache, acrylic. You can use whatever is at hand, as well as cut out stamps from potatoes, print cut vegetables, etc. Watercolor is good for creating textures. We take a napkin, dip it in paint and leave traces that are quite similar to stones, for example.
10. Plastic cling wrap - cling film
Did you know that film can draw too? It is enough to lay it on wet watercolor and move it. Ice crystals or other kinds of abstraction are obtained.
If you make one large even "window", framed by wrinkles, then after the paint dries you will see, say, a lake, or a wormwood. In the photo, it even looks like a rose.
11. Blowing - blowing up
Another technique for drawing with a straw. Blow again, but this time as hard as possible, dropping a drop of paint across the leaf, and you end up with intricate trees or just funny weirdos, or perhaps hair for a pre-drawn character.
If you want, you can let the paint flow on its own wherever it wants. Just turn the sheet vertically, and then fantasize with the child, it looks like it.
12. Light table - light table
Or a window, to put it simply. 🙂 This technique is not for toddlers, but mom can create a gallery of children's portraits if she wants. All relatives will be provided with gifts for a year in advance. As a child, I think, everyone "brought together" pictures, applying the original with a white sheet to the window. And if you take a photo? In photo editors, you need to ensure that there are 2 colors left - black and white (the posterize function).
Then there are several options for action. You can paint over all the white areas with wax crayon or a candle, and then go through with watercolors. It turns out interesting, but not very clean, because it is rather difficult to track where the chalk went.
You can simply circle all the white spots with a pencil, and then carefully fill the rest with paint. It's not as long or as difficult as it sounds. Just a little patience and accuracy, and you have 3-4 portraits for a child's daytime sleep.
If you decide to put the case on stream, then in hobby markets it is better to purchase a reserve liquid for watercolor paper. Apply it with a brush on white, go through it with watercolor on top, and then remove the reserve, like a film from a sheet. Fast, clean, original.
Watercolor is one of the most difficult materials for painting; it does not forgive mistakes. The main difficulty is that white it is not in watercolor, therefore, instead of it, unpainted areas of paper are used, and due to the transparency of the paint, flaws cannot be completely covered with a new layer. But the complexity of working with watercolors is also its main charm - only watercolors can lie on the paper with the thinnest veil, and only watercolor painting such airiness and lightness are inherent.
There are no particular difficulties in the drawing technique itself. Watercolors are a very malleable paint when approached. Sometimes, in order to get some kind of pattern, it is enough to drop a little paint on the dampened paper. It is thanks to this opportunity that drawing with watercolors turns into a fascinating process, which sometimes delays for a long time.
Materials (edit)
Since the effect of veil and lightness is achieved in watercolor through interaction with water, the paper must be rough and resistant to a lot of moisture. For watercolor, paper with a density of 180-300g / m2 is used - you will find this mark on the package. Lighter weight can cause the paper to wrinkle or tear during drawing.
Traditionally, squirrel brushes and a column are used for watercolor work. Squirrel brushes are a budget option with excellent properties, they hold and release moisture well and have a fine tip. Squirrel is a softer brush, which is good for making broad or abstract strokes, and a column is more elastic, holds its shape better and gives sharper lines. In addition, there are now good synthetic brushes that are similar in quality to a column. Brushes are numbered from one to fourteen. For beginners, brushes # 3, # 6 and # 8 are enough. The largest brush for the fill, the medium brush for the main image, and the thinner brush for drawing in the details.
The first thing to know when choosing watercolors is that honey is not suitable for painting, since its production uses a low-quality pigment that is difficult to mix, and it is almost impossible to blur such watercolor - it firmly clings to the paper. The main domestic producer of watercolors is Nevskaya Palitra. Their line includes Sonnet paints suitable for aspiring artists, and more professional paints with best quality pigment. Watercolor can be sold in two formats: tubes or cuvettes.
 Pros and cons of cuvettes:
+ all colors in sight;
+ as a rule, upon purchase, all the necessary colors are already in the set, and some colors do not have to be mixed by yourself;
+ cuvettes can be put in a box that will serve as a palette at the same time;
+ cuvettes can be replaced if a certain ink has run out - they are sold separately;
- since the cuvettes are small, then when working with a large brush there is a risk of constantly catching neighboring colors;
- the cuvettes often stick to the box lid and become entangled.
 Pros and cons of tubes:
+ tubes are more convenient for mixing paints;
- individually, tubes of watercolors are sold very rarely, so if some paint is over, you will have to buy a new set;
- tubes require a constant presence of a palette.
In addition to watercolors, paper, and paint brushes, you will need a tablet to attach the paper to, and masking tape to secure the paper to the tablet. It will not be superfluous to have a simple thin pencil and an eraser.
The first acquaintance with watercolor
After buying paints, you need to get acquainted with watercolors. Take paper and draw a grid on it according to the number of colors in the set. Label each field with the name of the paint and stretch it - that is, take a lot of paint on the brush and, adding water, reduce the color from dark to barely noticeable. Such stretch marks need to be done for each color in order to understand how this or that shade behaves depending on the amount of water, and as a bonus you will have a "catalog" of possible shades. After that, try mixing colors with each other and remember the resulting colors - this will help you better use the possibilities of the palette.
Painting techniques Glazing is one of the most important watercolor techniques. This is a gradual overlay of transparent layers of paint on top of each previous layer, which allows for deeper, more saturated colors without increasing the amount of paint on the brush. The technique of overlaying also allows you to achieve a particular lightness of the image and take some elements to the background - it is the glaze that is used to create an aerial perspective. Four rules will allow you to master this technique:
- Each next layer is applied only when the previous one is completely dry.
- Watercolors should be diluted sufficiently with water; when applied to paper, the color should be transparent.
- Only soft brushes are used for glazing; hard synthetics can scratch the previous layer of paint.
- Layering is possible only on high-quality thick paper.
- Puddles of water should not be allowed to form on paper, they will draw all the paint into themselves. If puddles appear, suck them in with the tip of a brush or paper towel.
- In this technique, overlaying colors should not be used; instead of spectacular transitions and tones, you will get dirty colors.
The dry brushing technique is used to create complex textures, whether it be wood or water. Draw paint on a brush, and then blot it with a cloth or napkin, removing excess water, and then apply paint to the drawing strictly with the edge of the brush.
Graduated washes are good for creating the sky. Dial a large number of paint with moderate amount of water on a large brush and draw a line from edge to edge along the top of the sheet. After that, draw some more water on the brush, and draw a second line, engaging the first. So paint over all the necessary surface, collecting water in front of each new line.
In addition, for painting with watercolors, you can use the very wet brushing technique on dry paper, which gives an effect similar to the wet technique, but is more controlled, as well as the spray technique or the technique with salt. A slightly damp sponge can be used as tools to create lifelike foliage on trees, or a randomly crumpled paper towel can be used to create a curly texture in the wet technique.
For watercolor painting, I suggest you familiarize yourself with various methods and techniques. Watercolors are easier to work with than oils, but mistakes are more difficult to correct. However, this does not mean that it is impossible to correct watercolor work... And knowledge of the terms will help you in the further study of techniques for working with watercolors.
Rinse the brush
To remove paint from the brush, lightly tap the bottom of the container with water. This will wash out most of the paint. If you've just worked with a dark color and need to brush a lighter color, tap harder with the brush. Then rinse the brush in a container of clean water.

Draw a full brush
Run a clean brush over the diluted paint and then lift it up. You will know that the brush is full if excess paint drips from the tip. Remove excess paint by running just one tip over the rim of the container.

Dial brush
Do the same as described above, but remove excess paint from the brush by running several times along the rim of the container.

Blotting or dabbing
Another way to remove excess paint or moisture from the brush is to run it over a rolled paper towel. This term also describes the removal of excess moisture or paint from a drawing.

Get a little wet
Touch the tip of your brush once to a cloth or paper towel. This will remove some of the excess watercolor or moisture from the brush. This term also describes the amount of pressure that a paper towel (napkin) has when removing paint or moisture from a drawing.

Remove moisture completely
Step 1.
Touch one side of your brush to a paper towel.

Step 2.
Turn the brush over and touch the other side of the brush to a paper towel to remove any moisture.

Removing, scraping and blotting
Sometimes when painting, you need to remove the watercolor paint from the paper. The color or tone may be too dark, or a mistake was made, or an area was painted over that you did not intend to paint on.
I'll show three easy ways How to remove paint: with a clean damp brush, scraping with a stiff brush and blotting with a cloth.
How to remove watercolor paint
This technique is used to remove damp, slightly damp or dry watercolors.
You will need: A clean, damp brush and a clean, damp cloth.

Removing paint using the flat side of the brush.  Removing paint using the tip of a brush.
How to remove paint using the flat side of the brush
With a clean wet brush, paint a few strokes in the area where you want the paint to be removed. Dry the brush on a damp cloth. Repeat the strokes one more time. If you want to remove more paint, then rinse the brush and blot it on a cloth. Wipe paint off the brush on a cloth. Repeat again if necessary.
How to remove paint with a brush tip
If you want to capture narrow lines, shape the tip of the brush with your fingers. Using short brush strokes, peel off the paint line, then rub the brush on a damp cloth.
How to scrape off paint
This technique is used to remove paint that has already dried. You will need a stiff bristled brush and dry cloth.

Scraping with the tip of the brush.  Scraping with the flat side of the hand.
How to scrape paint off with a brush tip
Moisten the brush and lightly tap it several times on the side of the container with water. Use the tip of your brush to lightly scrub the area with continuous strokes. Wipe off excess paint from the area to be cleaned with a dry cloth. Remove paint from the brush by hitting the bottom of the container with water. If you need to remove more paint, repeat the previous steps.
How to scrape off paint with the flat side of the brush
The method is the same as for scraping with the tip of the brush, but only using the flat side of the brush. You can remove paint with continuous, overlapping, downward strokes, or overlapping strokes from side to side. For best results, remove paint in one direction only, otherwise paint will flow back into the area you have already cleaned.
In order to remove paint on a heavily shaded area, it is better to blot it with a paper towel rather than a cloth. The fabric will leave thread marks on the surrounding area.
How to blot paint with a cloth
Blotting paint with a cloth is an easy way to lighten a painted area; this way you can add texture to the picture. How much paint peels off depends on the moisture content of the wash and how much pressure the fabric is on the paper.
In the examples below, the top row of squares shows the results when the wet wash was blotted with a cloth. The bottom row shows the results when blotted with a cloth over a wet wash.

Take a dry cloth and wrinkle it with your hand. This will change the stiffness of the fabric. If you blot paint to create texture, then crush it even more.
Press the cloth against a damp area to blot some of the dye. As you can see from the example above, sufficient wash pressure can lighten paint significantly.
Brush dry, wet and salt
Dry brush technique
As artists, we enjoy exploring different and creative ways to create textures in our drawings. I will introduce the following methods: dry brush, wet, and texture with salt. We will master these methods gradually, guided by examples.
Dry brush technique
Dry brushing is a versatile and creative technique that applies more pigment to paper than water. This technique works best with textured cold-pressed watercolor paper or paper with a coarse grain.
Dry brush example


The close-up illustration shows how the dry brushing technique was applied to create the effect of tree structure on the birdhouse and on the old fence.
Applying the dry brush technique
Apply paint to a brush and then blot the brush on a paper towel. Run the brush lightly over the surface of the paper, using only the side of the bristles. To increase the contrast, dry the drawing and repeat the paint application process again.
For best results, use a good quality small tip round brush. With this brush, you can draw a line, barely touching the surface of the paper.
Raw Technique
Wet is another versatile and popular technique where paint is applied to a damp surface. This wonderful technique is used to create the effect of a soft blurred background in a painting.
Raw Technique Examples
Dry 
Wet 


The illustration shows a close-up of a smooth transition from a dark color to a lighter one. Shown is the texture that can be created using this technique.
Applying the technique raw
Apply clean water to the surface to be painted over. When the shine of the water has disappeared, start painting over it. You can add water on top of the paint to enhance the effect.
Use solid colors for best results. Wait until the wet sheen of the previous color is gone before applying a new color. Otherwise, the surface will be too damp and the colors will not create the desired effect.
Colors will be slightly lighter if applied to a damp surface. Before using paint, you can test its tone on small pieces of paper.
Salt technique
The salt technique is a fun and creative way to add different structures to a drawing. Table salt will produce a small and compact pattern, while using sea salt the pattern will be large and beautiful.
Salt Technique Example


The close-up illustration on the right shows an enlarged drawing with a wonderful structure that was made with salt.
Applying the salt technique
First, paint over the area where you would like to apply salt. When the glitter of the water has almost stopped, take a pinch of salt and sprinkle a little over the painted area. Dry the paper, but DO NOT LEAVE SALT ON THE SURFACE OF THE PAPER! Once the salt area is completely dry, gently sweep the salt off with a paper towel.
I think that the main secret of using salt is the timing and moisture content of the paper. Warm and dry environment can cause paint to dry too quickly, leaving no time for salt to dissolve. High humidity can have the opposite effect and you will have to wait a very long time.
Sponge, graduated washes and splashes
Let's continue our acquaintance with the techniques and effects. Here's how to use a sponge, paint graduated washes, and use splashes in paintings. Each of the techniques has short instructions, examples and illustrations.
Sponge application technique
Using a sponge is a really fun and easy way to add lightness and airiness to foliage and trees.
Example technique


In the close-up on the right, you can see how great the technique is when creating the illusion of tree foliage.
Using a sponge
Prepare a sea sponge by immersing it in clean water and wringing it out. Roll the sponge several times in paper towels until it is just damp. Examine the sponge and find the area you want to use on it. Dip the sponge into the paint. Lightly touch the sponge to the paper where you would like to make the texture. When you apply the paint, blot the sponge on damp paper towels. Repeat this process several times to remove the paint permanently. Now dip the sponge into the next paint and repeat the process. For best results, start with lighter colors and work out with dark colors.
The most popular sponge for this technique is the “sea sponge”, which can be found in some stores. I also use a sea sponge.
If you cannot find a sea sponge, you can use a household sponge.
Household sponge 
How to prepare a household sponge
Use scissors to cut the new dry sponge into 2 ″ x 2 ″ squares. Rinse the squares several times to remove any impurities after the sponge was manufactured by the manufacturer. Then squeeze and roll the squares in a paper towel. Use your fingers to round one corner of the square, tearing off small pieces of the sponge. When you're done, dip a sponge with this corner into the paint and lightly touch it to the watercolor paper trim to view the print. Continue removing pieces until you are happy with the result.
Graduated wash technique
Graduated washes are an excellent technique for depicting the sky. When painting an endless sky, you start out with a deep blue. As the sky approaches the horizon line, its shade becomes lighter. You can create this effect using the Gradient Blur technique.
Graduated wash example


The close-up illustration shows using the reverse method to paint the sky. You can see the sky changing color from dark blue to lighter as you get closer to the horizon.
Applying the Graduated Blur Technique
Start the same way as if you were painting a color controlled blur. Apply paint to the paper from one edge of the paper to the other. Then put a drop on the brush pure water and quickly mix it with paint on paper. Smear the paint with a drop of water from one edge of the paper to the other. Put fresh water on the brush again and quickly mix it with the resulting color. Continue to paint over, in this way, the whole drawing. Wipe off excess water with brush and drawing.
Using the Variable Graduated Washer Technique
Dilute the two shades on the palette two shades of heavenly paint, making one lighter and the other darker. Begin the graduated wash with a drop of clean water. Then, brush on a light shade and paint over the drawing until you reach the other side. Rinse the brush well. Again, brush a light shade on the brush and paint over the drawing with a drop of paint until you reach the other side. Rinse the brush well. Repeat this procedure until you have painted a sufficient area of the sky with a light tint. Then start applying the darker shade as well. When you're done, wipe off any excess paint. Leave your drawing at some angle and keep wiping off excess paint until the shine is gone.
Reverse graduated wash example

Both of these methods are done on an incline. When using the inverse graduated blur method, flip the drawing so that the top of the sky is closer to you.
Spray technique
The splatter technique is a great technique for creating depth and texture. You can use either a watercolor brush or a toothbrush. They give the same effect, but with different results.
An example of a spray technique


In a close-up, the spray technique can be seen to add a dual sense of depth and texture along the edges of the petal.
Using the spray technique
Dilute medium dark paint on the palette. Touch the paint with the entire bristles of the toothbrush. Lift your toothbrush and hold it with the bristles upside down over the desired area of the pattern. Now slowly slide your thumb all the way along the bristles. This process can be repeated several times before reloading the ink. Direct the spray by turning your toothbrush.
For best results, use a medium dark shade of paint. Lighter shades will not create a good effect. You can add the appearance of a blur by splashing onto a wet surface.
Splashes can accidentally hit areas where they are not needed. In order to prevent this, the drawing must be covered with paper towels.
Watercolor terms - continued
As you draw and learn these terms and techniques, you will develop your skills at the same time. Soon, the simple "Draw a full brush" will become a habit.
Sizing
Sizing is a glue-like substance that is applied by the manufacturer to one or both sides of watercolor paper. It slows down the complete absorption of watercolors and water and prevents any unwanted spreading. That in turn will allow you to finish painting and achieve deep and rich colors with smooth edges.
Since the sizing is invisible to the eye, it is impossible to tell exactly whether it was too much or too little, and whether it was evenly distributed over the surface of the paper, especially after it was dried. White spots and roughness may appear which are difficult to correct afterwards.

Watercolor blob
The word blob, which I use in tutorials and projects, refers to a watercolor blob - a continuous horizontal volume of droplets of watercolor or water stretched across a specific area on a piece of paper. In this case, the sheet of paper should have a certain angle of inclination relative to the horizontal surface.

Controlled wash
Controlled washes - Apply watercolors neatly and evenly (as in a flat surface wash or graduated) that covers a large or small area. An extended horizontal watercolor blob should be worked on an incline.

Uncontrolled wash
This term describes a more expressive and less controllable way of applying watercolor or water to paper. In this case, the paint is applied with a flat brush with various strokes on a dry or damp surface of the paper.

Transition
This word describes the wet transition from one watercolor color to another.

Gloss / Wet gloss
“Wet Shine” is a term used to describe a method or techniques to prevent the newly painted area of a drawing from drying out. They should maintain their shine for a while. Glitter is characterized by a bright gleam that water causes when it reflects light. Gloss intensity refers to the moisture content of the watercolor on the paper.
The main photo shows the sparkle in the newly painted area of the drawing; in the photo below, the same area with the shine that has almost disappeared.


Common blur problems
So, you have read all the steps for the lesson "How to paint a controlled blur", drew some rectangles and prepared the paint. Then we painted the watercolor wash following the instructions, but it still looks wrong. Questions arise: "What caused these or those stripes?" and "Why is there a big blot around the border of the rectangle?"
These problems arise for everyone, especially at the beginning of mastering this technique. The good news is there are tips for fixing these and many other issues. Below are illustrations showing some of the most common watercolor wash problems.
Common blur problems and tips to fix them

Problems
1. There was no watercolor drop, so the top dried quickly.
2. Applying too much pressure to the brush, creating a lighter shade and uneven paint overlap.
3. The entire area of the rectangle was painted over at one time and the paint on the wash dried out too quickly.
4. Excess paint was not removed at the end of the wash and left a bubble effect on the paper.
5. The watercolor blob was too small and has dried out. After adding paint, the color became more saturated, creating a bubble effect.
6. The watercolor blob is over and after creating a new one, we get a bubble effect.
7. The wash was well completed. The brush was rinsed, but not blotted too thoroughly with moisture before wiping off the rest of the paint.
Troubleshooting tips
1. Before starting to paint over the area, create a watercolor blob.
2. Try not to apply too much pressure with the brush to the surface of the paper while drawing. Apply light, neat strokes.
3. Reduce the distance between strokes and brush more often.
4. Remember to remove excess paint when you finish washing.
5. Make sure that enough watercolor blob is injected and the area above it remains moist.
6. Brush paint frequently to maintain sufficient watercolor drop volume.
7. There is no need to rinse the brush at the end of the wash. It is enough to blot the brush well before removing paint residues.
If you are just starting out your way in watercolor painting, the course will tell you the right attitude to technique and will give you several invaluable examples that can become the basis in the comprehension of mastery.
If you study at an art school or courses, you will find in my video lessons the solution to many technical and artistic problems that you face in the learning process.
If you have been painting with watercolors for a long time, my techniques can enrich your technique, summarize the experience and bring you to a new level of mastery, freeing and liberating your brush.